Quick Starts
Each sequence intended to be run sequentially. The first is quite detailed - later ones more succinct (we assume users know the User Interface by then)
When adding a new resource, use the description field for a ‘human readable’ description of the resource (this will become the .text element). The ‘display’ field is much shorter, and is intended to identify the resource in the graph. For example, the ‘display’ property of the List in the first view of the Problem List sequence might be ‘Problem List’, and the description would be the textual contents of the list.
The idea is that the description (.text) can be displayed to a user to describe what the resource is all about - the structured data is for computers to work with. In most of these exercises, having reasonably complete descriptions is the main goal.
The first sequence describes the individual steps in some detail - subsequent sequences assume the user can set up the references.
Problem List sequence
Build the initial list
- Load the app (http://gb2.clinfhir.com/)
- Click the green ‘New Project’ button at the top right
- In the dialog that appears, enter a name and a description. After saving, the new project is displayed on the Project selector page. Click it to display the editor.
- Click the green ‘Add a new resource instance’ link at the upper right. This will display the resource type selection screen.
- Select the Patient type, then enter a display name and a description in the dialog that is displayed
- Repeat steps 4 & 5 to add a List and 2 Conditions
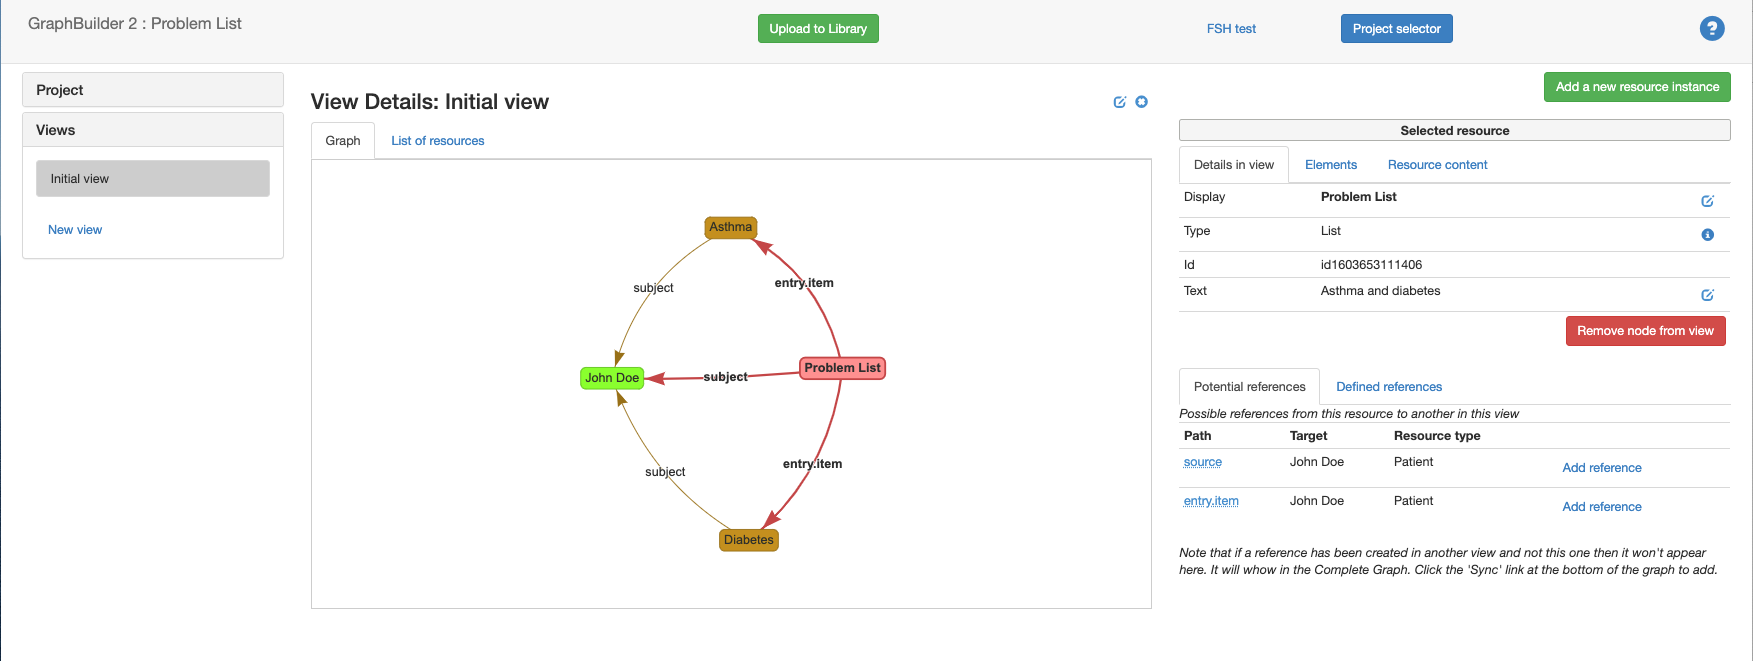
- Select the List resource in the graph. In the right pane will appear the details of the resource, including the potential references to other resource instances in the graph
- Select the references to the Patient (subject) and conditions (entry.item)
- Select each of the Conditions and set the subject to the patient
- Move the resources in the graph into a clear layout (initial layout is random)
This is what it should look like (the List resource instance has been selected):
Add a new Condition
- In the left pane click the ‘New View’ link in the views panel.
- Enter a name for the view, and select the ‘Copy from previous view’ checkbox. Save the new view
- Select the new view
- Add a new condition resource as described above
- Select the List and add the new condition to the list.entry.
Add structured data
Structured data is entered using the FSH (FHIR ShortHand) standard. At the time of writing, support is limited (but is being enhanced). In particular, it is not yet possible to save resources to a FHIR server within the app
- Select the resource to add structured data to. The details of the resource will show in the right pane.
- In the right pane select the ‘Resource Content (FSH)’ tab. The FSH content that represents this resource will be displayed. The app will automatically insert the references from the graph. The FSH can be edited by directly typing in the edit control, or the FSH editor can be loaded by clicking the edit icon to the upper right of the edit control. For less experienced users, the FSH editor is easier.
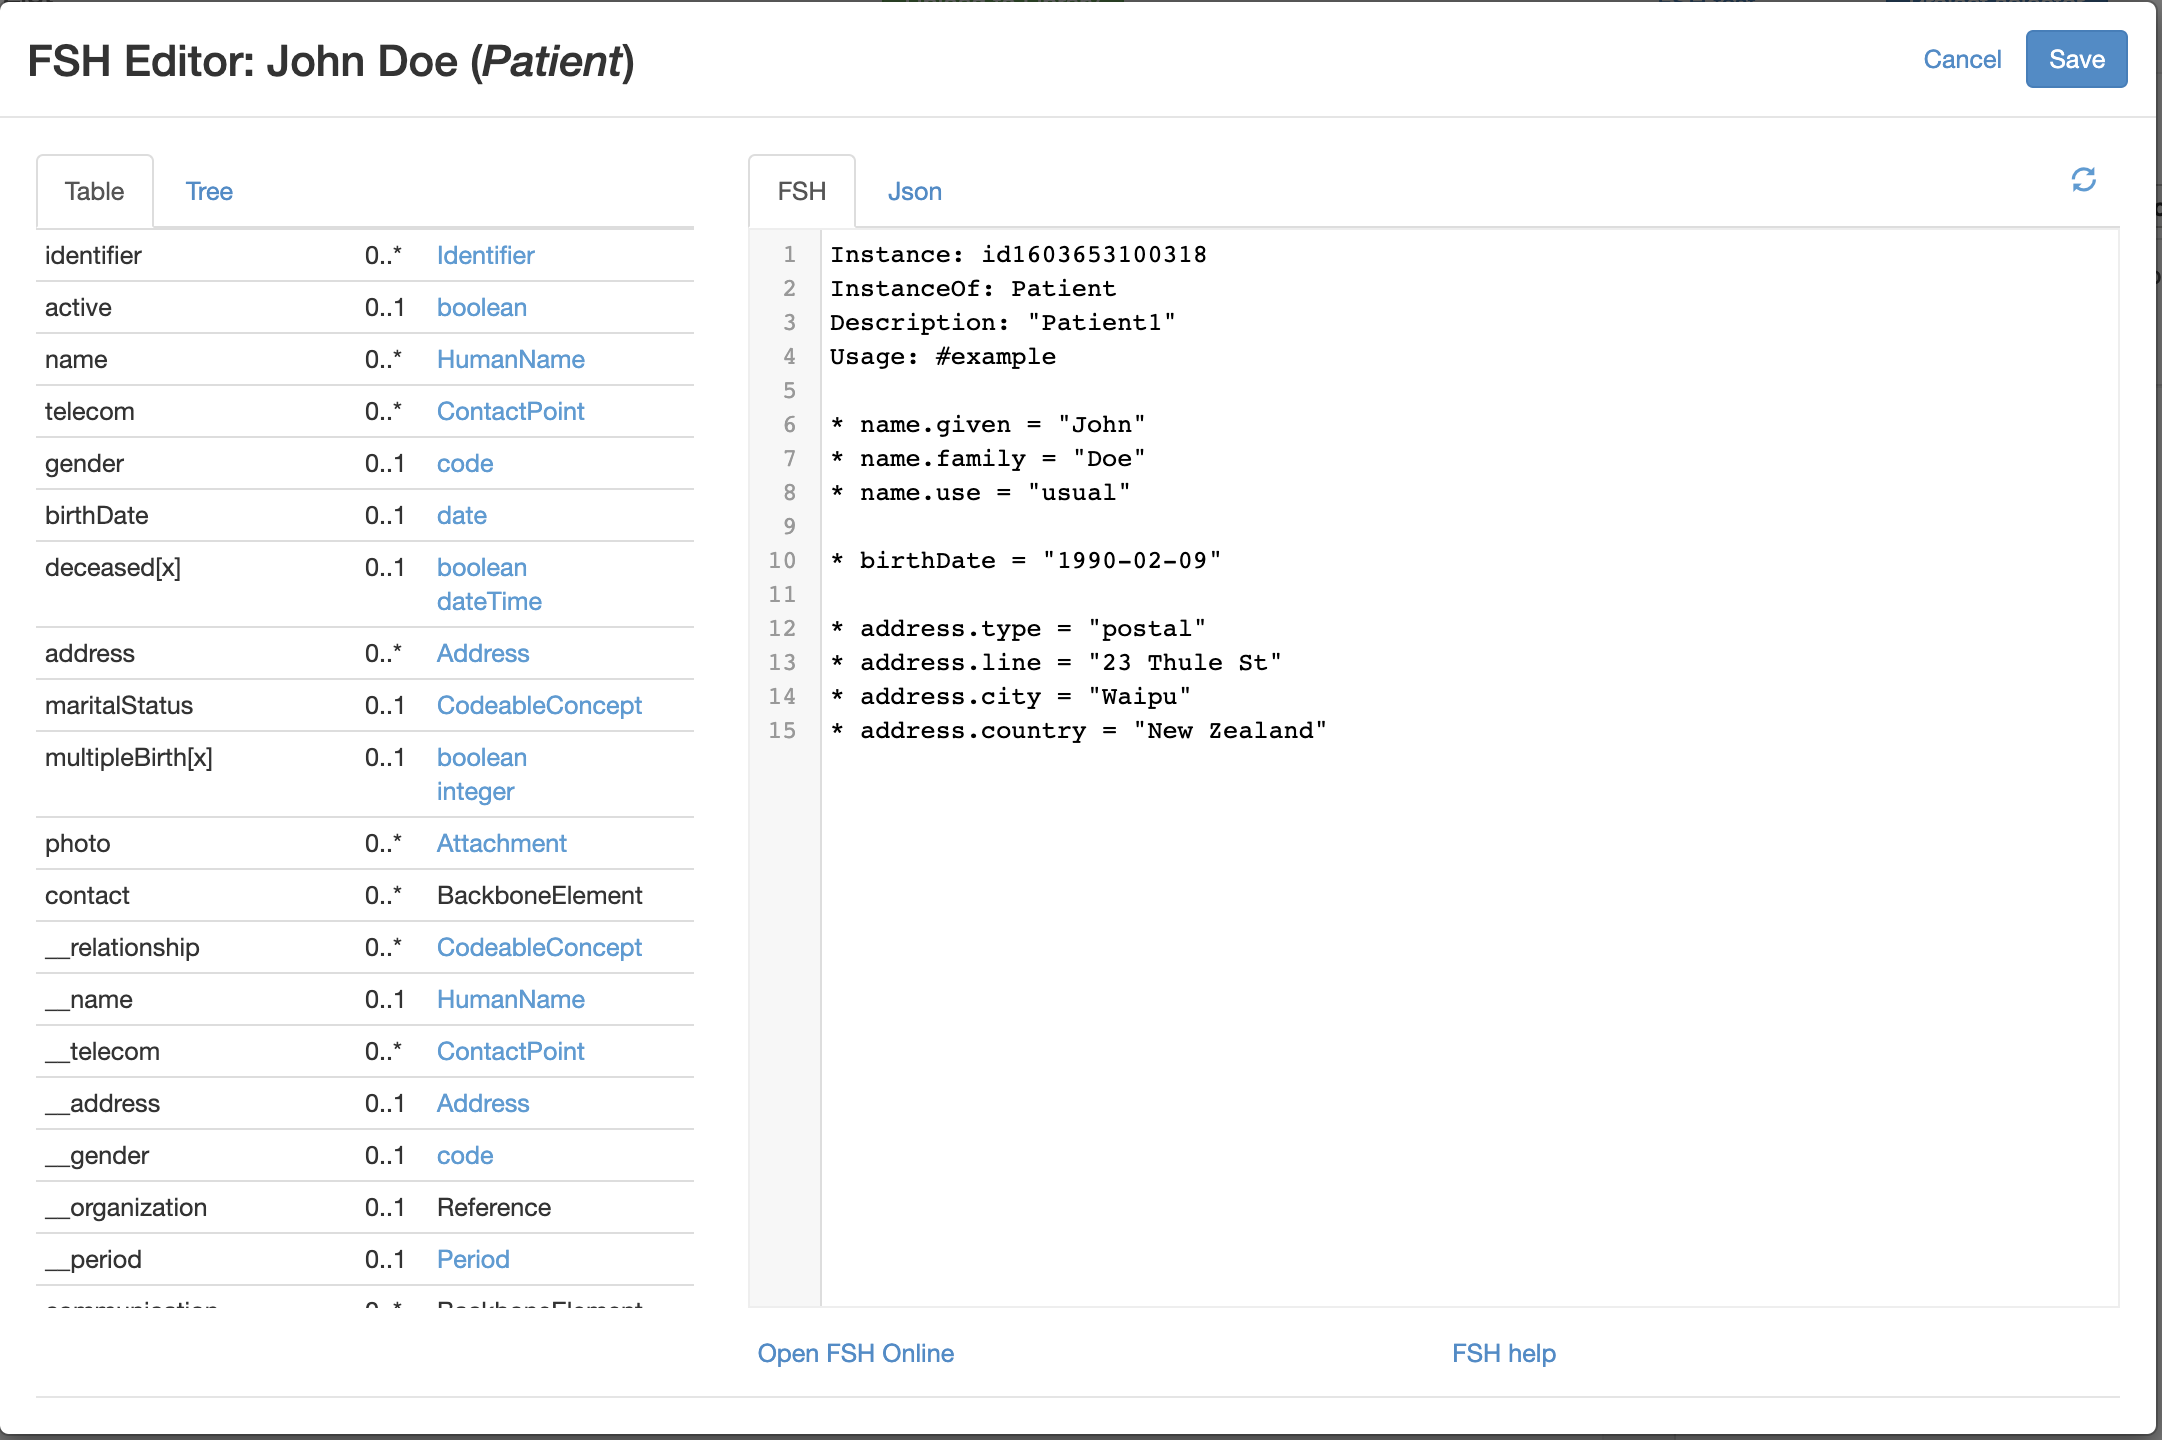
- Click the edit icon. The FSH editor is displayed.
- The FSH editor shows the elements in the resource to the left, and the FSH to the right. Clicking one of the datatypes for an element displays a dialog into which the value of the element can be entered. Saving this will add the value to theFSH. Coded elements can use terminology expansion to add elements.
- Add structured data as appropriate.
Here's a screenshot of the FSH editor with the Patient resource selected, and some structured data entered.
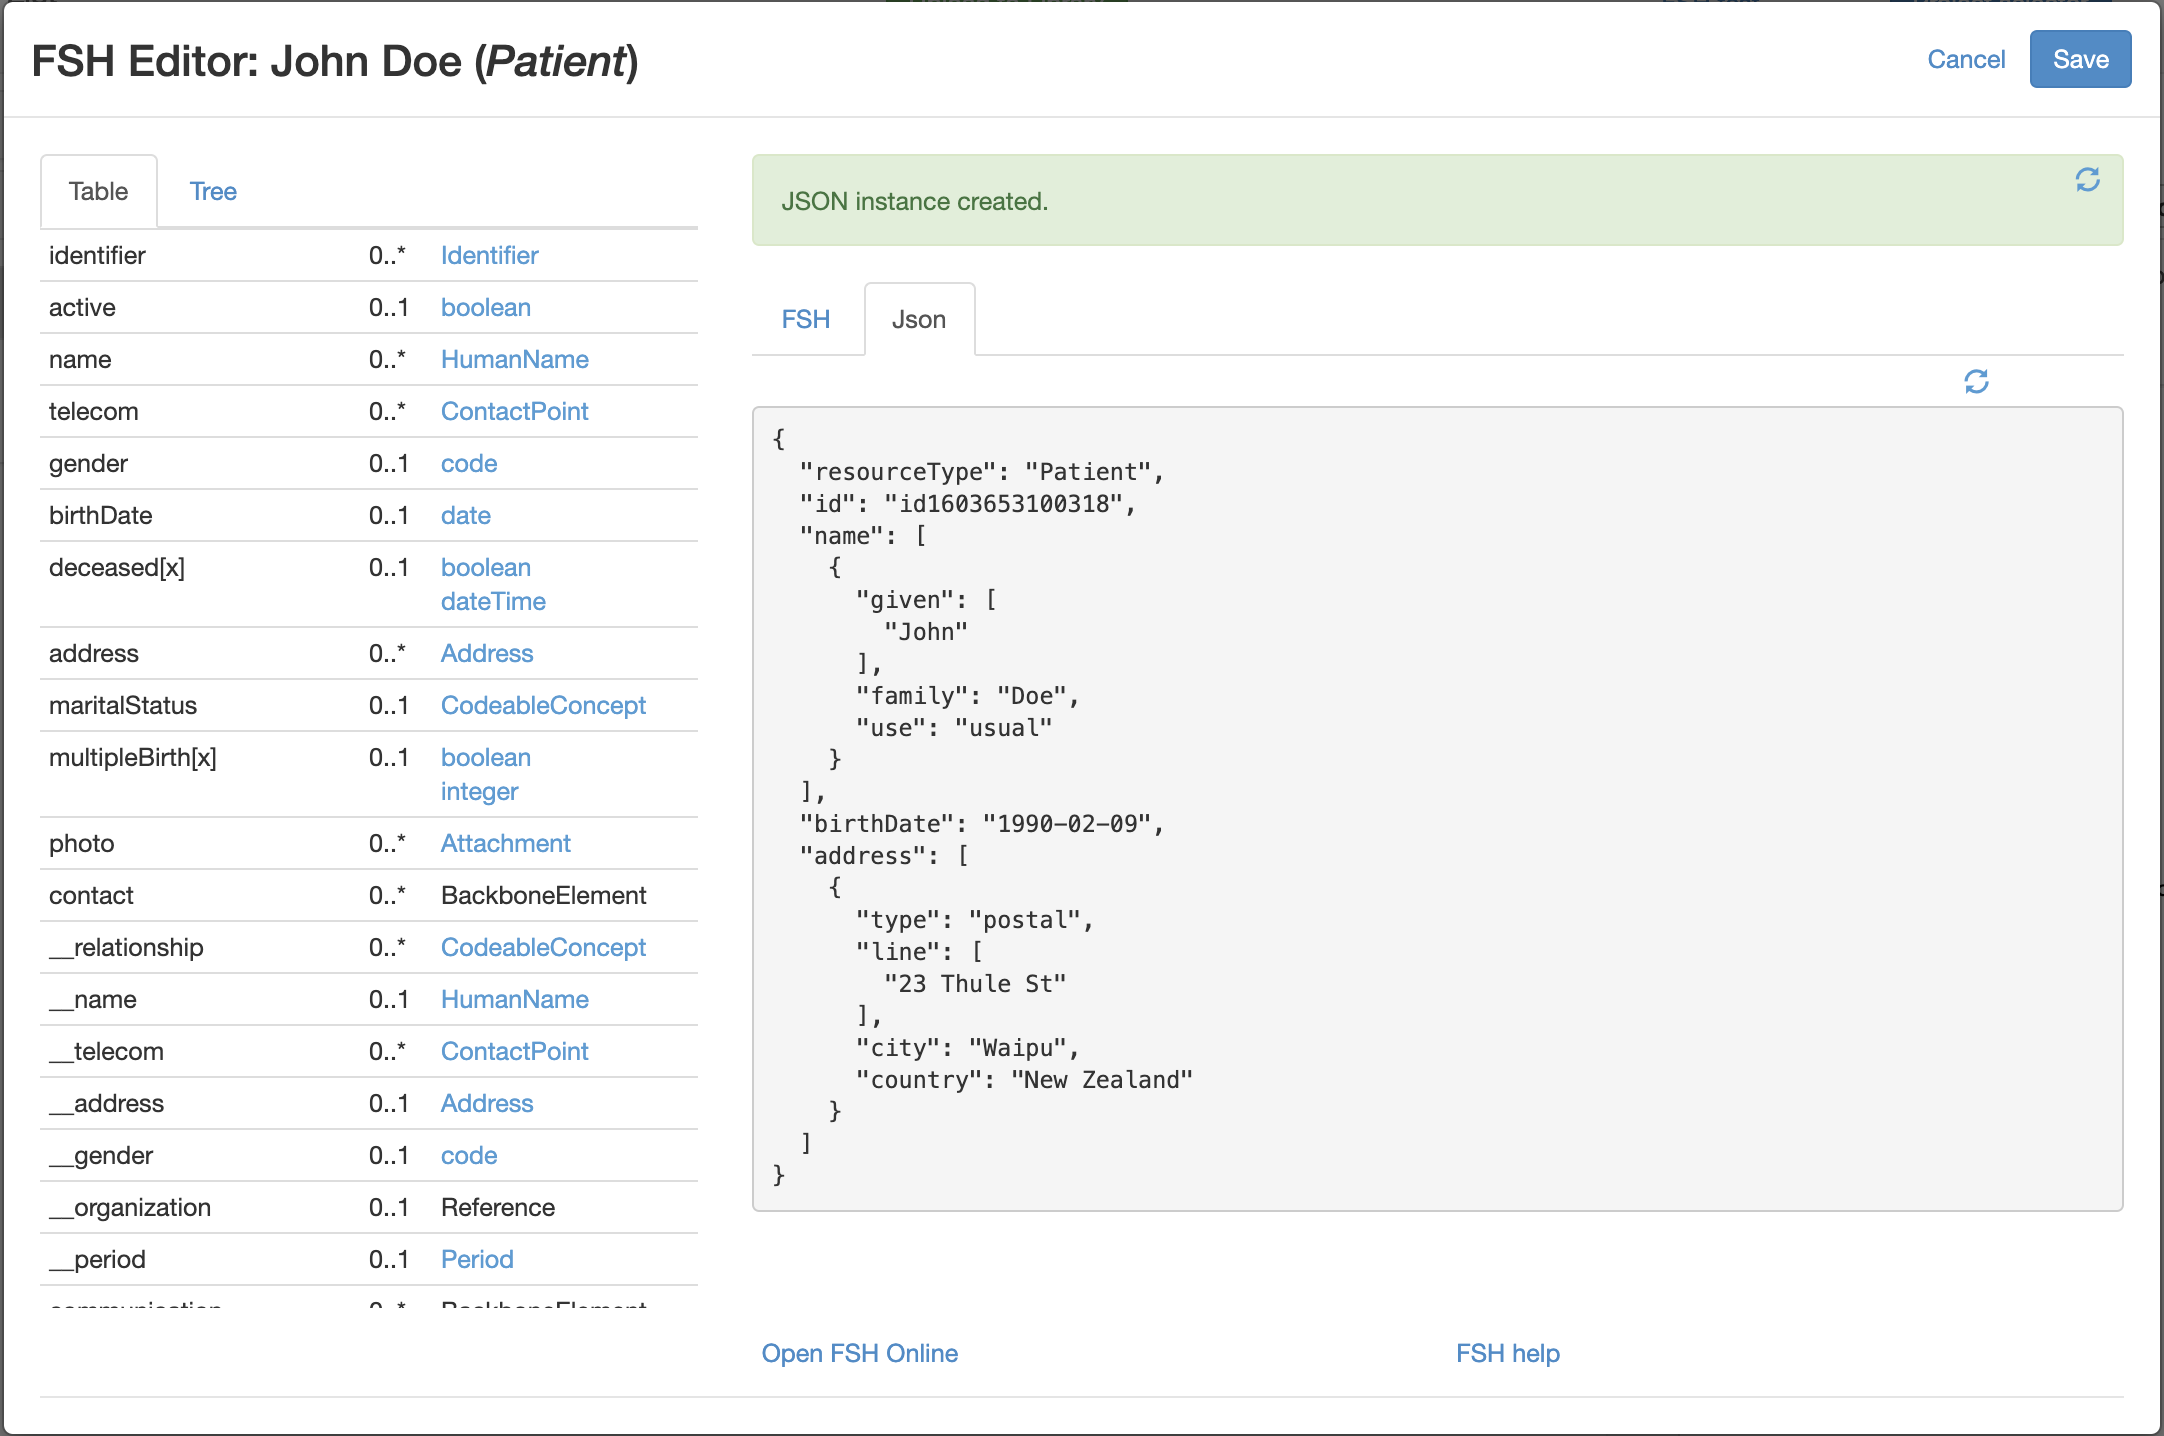
To generate the JSON instance, click the refresh button at the upper right. This will invoke the ‘sushi’ compiler which will convert the FSH into the JSON. Any errors will be shown above the FSH. If there are any errors they will be displayed in a red panel above the FSH. Generally, you will need to correct these manually by editing in the FSH text box.
Remember to click the 'refresh' link after making changes (whether manually or through the element selector) to the FSH to re-generate the JSON and view any errors.
Here's the JSON that was generated by sushi.
Note that sushi will perform some validation - but not necessarily a complete one. For example, it will check that the syntax for a code value is correct, but won't check that the actual value is correct. This should only be an issue if you edit the FSH directly as the correct value will be added if you enter it from the element list to the left.
Click the save button to save the FSH and exit the editor.
Note
Remember to click 'Save' to close the dialog, otherwise the FSH you entered will be discarded.
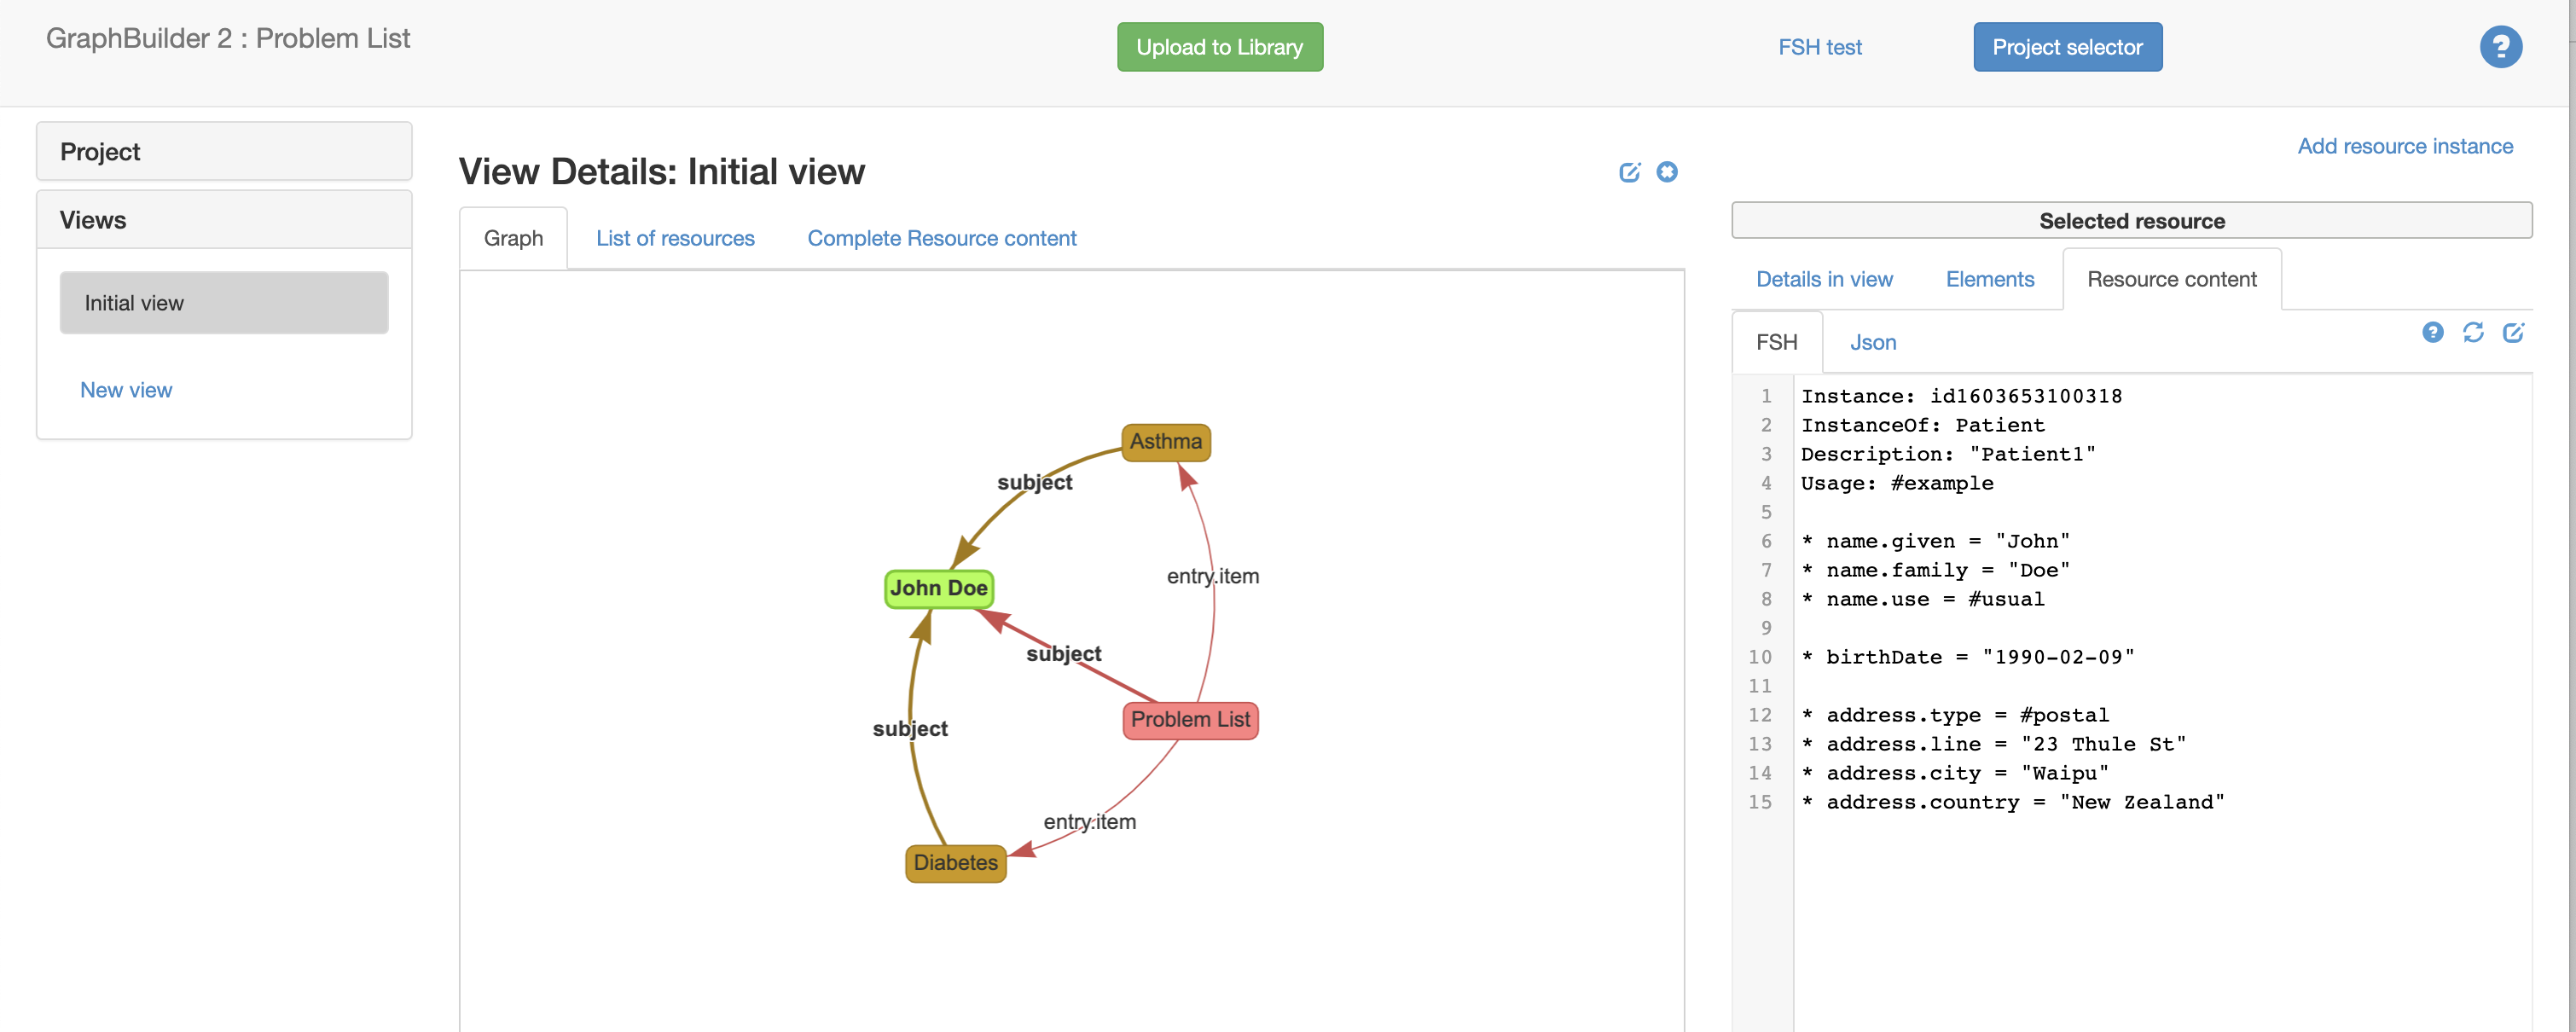
The final result
Appendectomy sequence
Representing a patient attending an ED with abdominal pain, being admitted for appendicectomy and subsequent discharge. Demonstrates the use of multiple views against the complete graph
Patient history
Click the project selector to display the project sector. Create a new project
Add the following to the initial view:
- 1 Patient
- Observations for Abdominal pain, high temperature, vomiting. Set the asserter to the patient (the subject should be connected automatically)
- An Encounter
ED Assessment
Create a new view copying from the previous one (Click 'new view', then select the 'copy from previous view' checkbox )
Add:
- A Practitioner to represent the ED doctor (as the asserter of Observations)
- Observations for pyrexis, rebound tenderness @ mcburney's point
- Condition for diagnosis
- Possibly a CarePlan for appendicectomy
Add structuerd data if you want, or just add descriptions
Procedure
- Create a new view, but don’t copy from previous
- Click the ‘Add resource instance’ then add the patient instance from the list of resources on the right that are in the model but not this view.
- Add Practitioners for Surgeon, Anaesthetist
- Add a Procedure for the Appendicectomy
- Add a DiagnosticReport and Observations / Specimen for the histology
- Add another CarePlan for post op care
Discharge summary
- Create a new view, but don’t copy from previous
- Add the patient from the main graph (in the ‘Add resource’ pane, select the existing patient)
- Add a Composition resource
- Add a Practitioner for the author
- Add the existing appendicectomy Procedure and encounter
- Create a CarePlan for follow up (eg removal of stitches)
Planned enhancement
(Note to me: How to better support documents - this won’t really support sections. Perhaps have a ‘type’ of View? - general, document, message etc. )
Otitis Media sequence
A patient attending their Primary Care Provider with ear pain and having a reaction to the antibiotic used.
History
Representing the history of the ear pain
1 Click the project selector to display the project sector, or re-load the app 2 Create a new project
Add to the initial view:
- Patient
- Observations for ear pain, elevated temperature
- An Encounter
Examination and Plan
Create a new view copying from the previous one
Add:
- Practitioner as the PCP (Primary Care Practitioner)
- Observations for pyrexia (the PCP as the asserter)
- Condition for Otitis media
- CarePlan or ClinicalImpression
- MedicationRequest for antibiotics
Return visit
- Create a new view, but don’t copy from previous
- Add the patient and practitioner from the main graph
- Add an encounter to represent this visit
- Add observations for an itchy rash (asserter = patient & asserter = Practitioner)
- Add a AllergyIntolerance for the allergy
- Add a MedicationRequest for a replacement antibiotic